The Plan: How We’ll Build Our Server#
Before we get our hands dirty with code, let’s quickly go over the plan. Understanding the moving parts makes everything easier.
Our setup uses these key things:
- A Git Repo: This will be our single source of truth, ensuring that no configuration is managed only locally.
- Proxmox for VMs: For my VMs, I’m using Proxmox, which I think is a basic necessity for every homelabber!
- A Workshop Server: We need this because the nixos-anywhere package is available in Nix. While you could install Nix on your everyday computer (like a Mac or a Windows PC), it’s much safer and easier to use a dedicated NixOS virtual machine for this.
- Think of it like having a perfectly clean kitchen to cook in. By using a temporary VM, we ensure that our building process is clean and won’t run into weird issues caused by our personal computer’s setup. Plus, keeping a centralized maintenance server helps keep things sorted in the worst-case scenarios. It’s also easily manageable from anywhere in the world if you’re familiar with modern tools like Tailscale or Netbird!
- The Main Homelab Server: This is the VM we actually want to build. It starts as a completely blank slate, and we’ll set it up entirely from our workshop server without ever touching it directly.
Here’s how it works:
- For the first-time setup: From the workshop server, we’ll run a tool called nixos-anywhere. This tool connects to the blank main server, partitions its hard drive, and installs NixOS exactly as we defined it in our blueprint.
- For future updates: When we want to change something, we’ll update our blueprint in the Git folder. Then, on the workshop server, we’ll use Colmena, a stateless NixOS deployment tool, to safely apply those changes to our main server.
Our Temporary Workshop#
First, we need that clean workspace to run our tools.
Let’s build this temporary command center. The irony here is that we’re going to set this one up manually. This will show newcomers how to set up a minimal NixOS machine and help everyone appreciate the automation we’ll use later.
1. Download the ISO: Grab the latest NixOS minimal ISO. I'm using the 25.05 stable channel for this guide.
In Proxmox, go to Local Storage -\> ISO Images -\> Download from URL:
https://channels.nixos.org/nixos-25.05/latest-nixos-minimal-x86_64-linux.iso
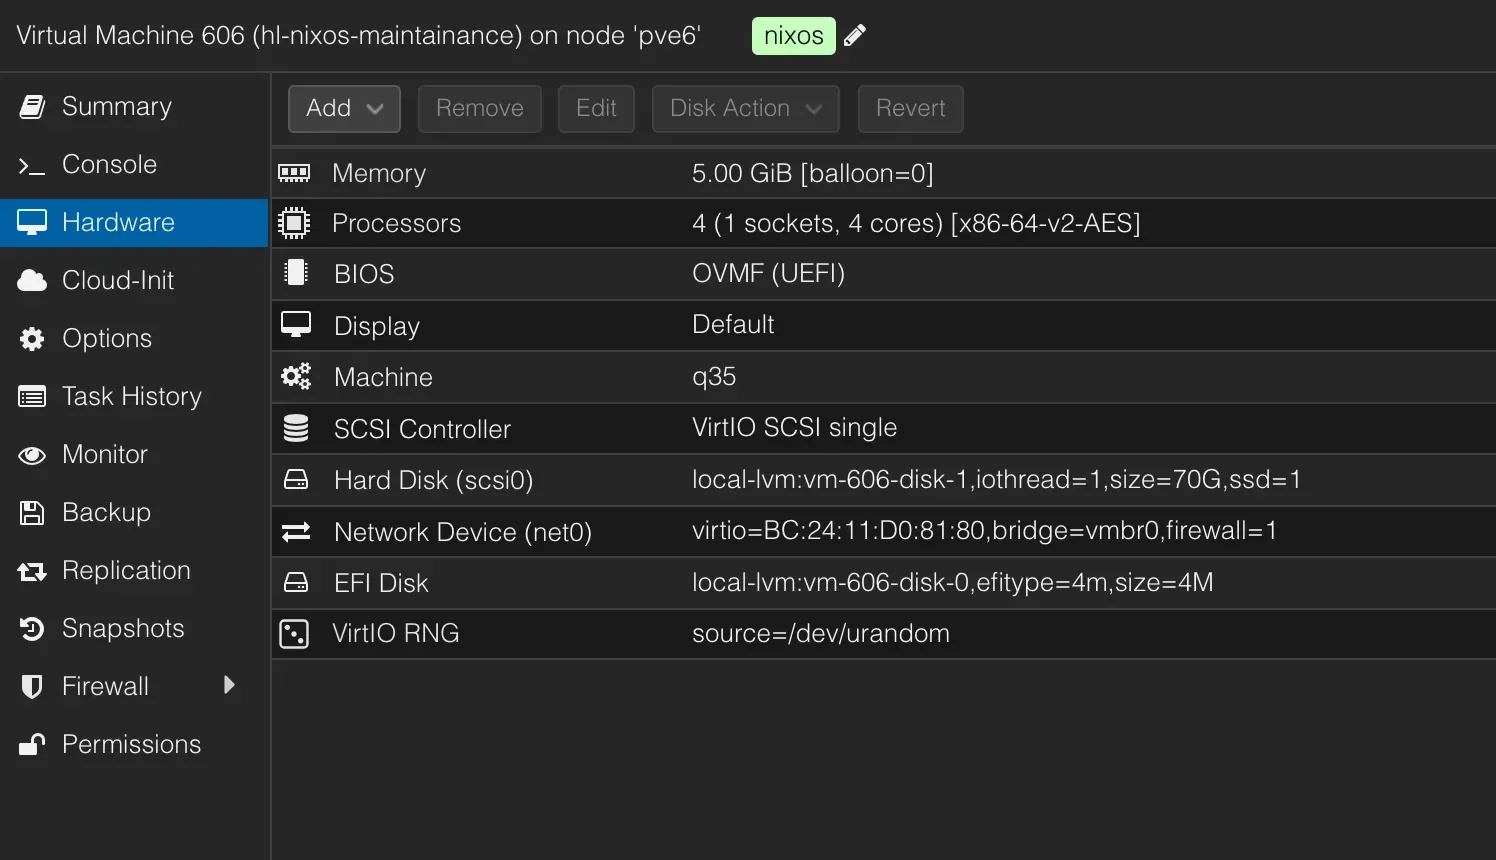
2. Create the VM in Proxmox:
* Name: nixos-maintenance-server
* OS: Use the NixOS minimal ISO you just downloaded.
* System: I'm using UEFI (OVMF).
* Disk: 32 GB is plenty.
* CPU: 2 cores.
* Memory: 4096 MB.
* Network: Bridge to your LAN. Crucially, note the MAC address so you can assign it a static IP (e.g., `10.0.5.113`) in your router's DHCP settings.
3. Boot and Partition: Start the VM. It will boot into the installer environment.
* Set a temporary password for the nixos user so you can SSH in if needed: passwd.
* Partition the disk. We'll create a simple EFI boot partition and a root partition. (Check your disk device with lsblk; we'll assume /dev/sda).
sudo fdisk /dev/sda
# Inside fdisk:
# g -> create a new empty GPT partition table
# n -> new partition, default, default, +512M -> creates boot partition
# t -> change type, 1 -> select partition 1, 1 -> EFI System
# n -> new partition, default, default, default -> creates root partition
# w -> write table to disk and exit
* Format and Mount the Partitions:
sudo mkfs.fat -F 32 /dev/sda1
sudo fatlabel /dev/sda1 NIXBOOT
sudo mkfs.ext4 /dev/sda2 -L NIXROOT
sudo mount /dev/disk/by-label/NIXROOT /mnt
sudo mkdir -p /mnt/boot
sudo mount /dev/disk/by-label/NIXBOOT /mnt/boot
sudo dd if=/dev/zero of=/mnt/.swapfile bs=1024 count=2097152 # 2GB size
sudo chmod 600 /mnt/.swapfile
sudo mkswap /mnt/.swapfile
sudo swapon /mnt/.swapfile
4. Generate and Edit Configuration:
* Generate the base configuration files: sudo nixos-generate-config --root /mnt.
* Now, edit /mnt/etc/nixos/configuration.nix with your favorite editor (nano and vim are available).
This is where you define the state of your maintenance server. Here's a solid, minimal config. Remember to replace the placeholder with your own public SSH key!
# /mnt/etc/nixos/configuration.nix
{ config, pkgs, ... }:
{
imports = [ ./hardware-configuration.nix ];
boot.loader.grub.enable = true;
boot.loader.grub.device = "/dev/sda";
boot.loader.grub.efiSupport = true;
networking.hostName = "nixos-maintenance-server";
networking.networkmanager.enable = true;
time.timeZone = "Asia/Kolkata";
nix.settings.experimental-features = [ "nix-command" "flakes" ];
environment.systemPackages = with pkgs; [
vim
git
wget
curl
];
services.openssh.enable = true;
services.qemuGuest.enable = true;
users.users.hacstac = {
isNormalUser = true;
description = "Akash Rajvanshi";
extraGroups = [ "networkmanager" "wheel" ];
openssh.authorizedKeys.keys = [
# PASTE YOUR PUBLIC SSH KEY HERE, e.g., "ssh-ed25519 AAA..."
];
};
security.sudo.wheelNeedsPassword = false;
system.stateVersion = "25.05";
}
5. Install and Reboot:
* Run the installer:
sudo nixos-install.
* It will prompt you to set a root password. Do it.
* Once it's finished, reboot. Remove the ISO from the virtual CD/DVD drive.
Your maintenance server is now ready! You can SSH into it using the user you defined (e.g., `ssh hacstac@10.0.5.113`). From here, we'll orchestrate the creation of our main homelab server.With our command center established, it’s time to draft the architectural plans for our main server. In the Nix world, this means creating a Flake. This file is the heart of our project, the single source of truth that will define everything about our machine.
Flakes 101: What’s the Big Deal?#
If you’re new to Nix, you’ll hear a lot about Flakes. So, what are they?
Think of it this way: a traditional Nix setup can have a small amount of ambiguity. When you reference nixpkgs (the giant collection of all Nix packages), your system might use a slightly different version depending on when you last updated your channels. This can lead to the classic it works on my machine problem, even within the Nix ecosystem.
Flakes solve this by being extremely specific about their dependencies. A flake.nix file declares all of its inputs (like a particular version of nixpkgs). A flake.lock file is then automatically generated, pinning those inputs to their exact Git commit hashes. This guarantees that anyone, anywhere, at any time, who uses your flake will get the exact same software versions. It’s the ultimate form of reproducibility.
For our server, we’ll start with the stable nixos-25.05 channel. This is a wise choice for a server, as it prioritizes stability over having the absolute latest-and-greatest (and sometimes buggiest) software. While the unstable channel is fantastic for desktops where you might want newer features, for a server that just needs to run reliably, stable is the way to go.
Structuring Your Configuration Repo#
A clean file structure is the difference between a maintainable project and a plate of digital spaghetti. We’re going to organize our configuration in a modular way that can easily scale to more servers in the future.
On your maintenance server, clone your empty Git repository and set up the following structure:
git clone https://github.com/AkashRajvanshi/hl-nixos-remote.git
cd hl-nixos-remote
.
├── flake.lock
├── flake.nix
├── LICENSE
├── README.md
└── servers
    ├── configuration.nix
    ├── disk-config.nix
    ├── home.nix
    └── tools
        ├── default.nix
        └── networking.nix
First up: Declarative Disks with Disko. This tool changes the game by letting us define our entire disk layout within a Nix file. This means our server’s configuration is reproducible from the partition table upwards, no more manual fdisk or mkfs commands.
---disk-config.nix
{ lib, ... }:
{
  disko.devices = {
    disk.disk1 = {
      device = lib.mkDefault "/dev/sda";
      type = "disk";
      content = {
        type = "gpt";
        partitions = {
          boot = {
            name = "boot";
            size = "1M";
            type = "EF02";
          };
          esp = {
            name = "ESP";
            size = "500M";
            type = "EF00";
            content = {
              type = "filesystem";
              format = "vfat";
              mountpoint = "/boot";
            };
          };
          root = {
            name = "root";
            size = "100%";
            content = {
              type = "lvm_pv";
              vg = "pool";
            };
          };
        };
      };
    };
    lvm_vg = {
      pool = {
        type = "lvm_vg";
        lvs = {
          root = {
            size = "100%FREE";
            content = {
              type = "filesystem";
              format = "ext4";
              mountpoint = "/";
              mountOptions = [
                "defaults"
              ];
            };
          };
        };
      };
    };
  };
}
---
With our blueprint drafted, it’s time for the main event. We’re going to take our flake, which describes our ideal server down to the filesystem, and use nixos-anywhere to make it a reality on a blank VM. All of this is done from the comfort of our maintenance server’s SSH session.
How nixos-anywhere Works Its Magic#
It might seem like black magic, but the process is actually quite clever. Here’s the play-by-play:
-
nixos-anywhere connects via SSH to the target machine (which is running the minimal NixOS installer).
-
It uses a Linux kernel feature called kexec to pivot the running system into a special NixOS installer environment, all in RAM. This effectively replaces the OS the machine booted from without needing a reboot.
-
From this RAM-based environment, it has full, unhindered control over the machine’s disks.
-
It then invokes disko, passing it our disko.nix configuration to partition, encrypt, and format the drives exactly as we defined.
-
Finally, it runs nixos-install, pointing it at our flake. This builds our entire system configuration and installs it onto the newly created root filesystem.
Preparing the Target#
This is the easiest part.
-
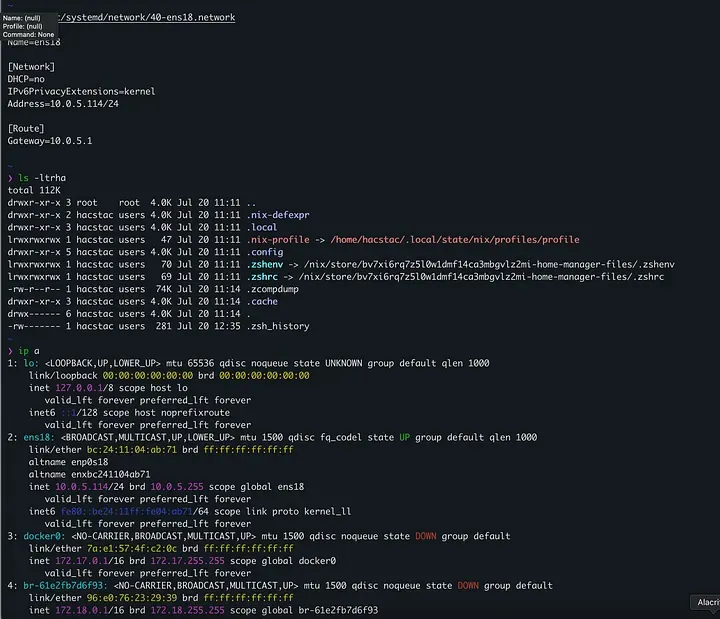
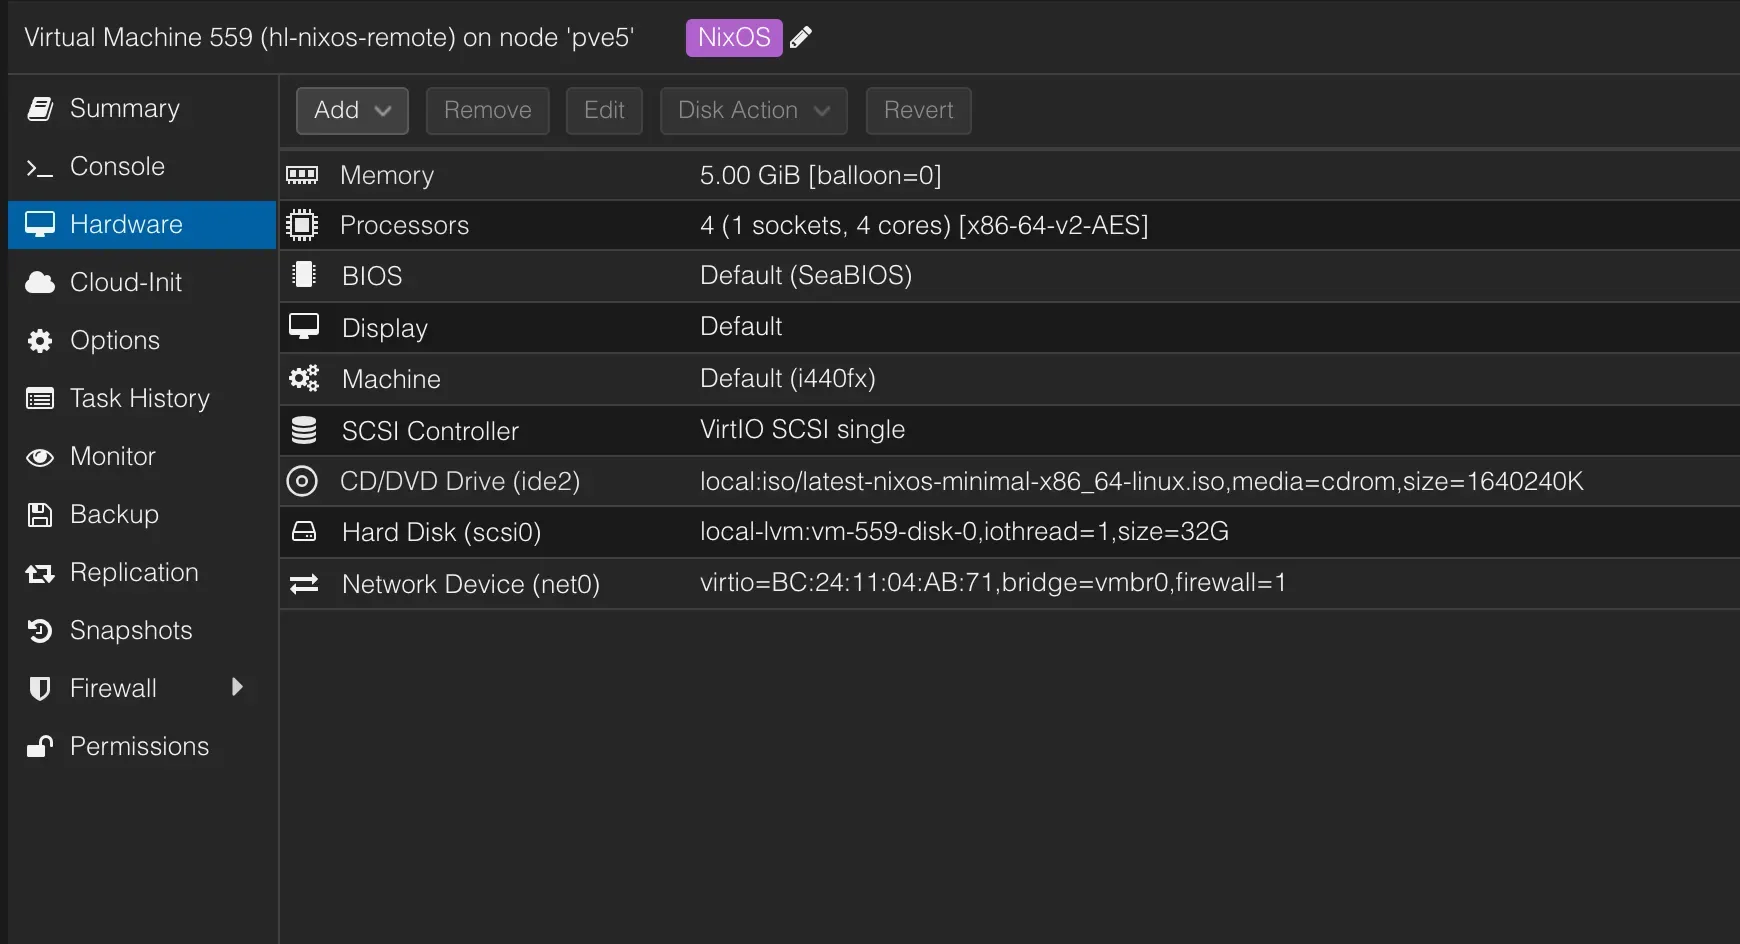
In Proxmox, create a new VM for our target server (e.g., hl-nixos-remote). Use similar specs to the maintenance server, or adjust them for your needs, and assign it a static IP (e.g., 10.0.5.114).
-
Boot it using the same NixOS minimal ISO.
- Once it reaches the command prompt, do just one thing: set a password for the nixos user. This is the temporary password nixos-anywhere will use to get in.
passwd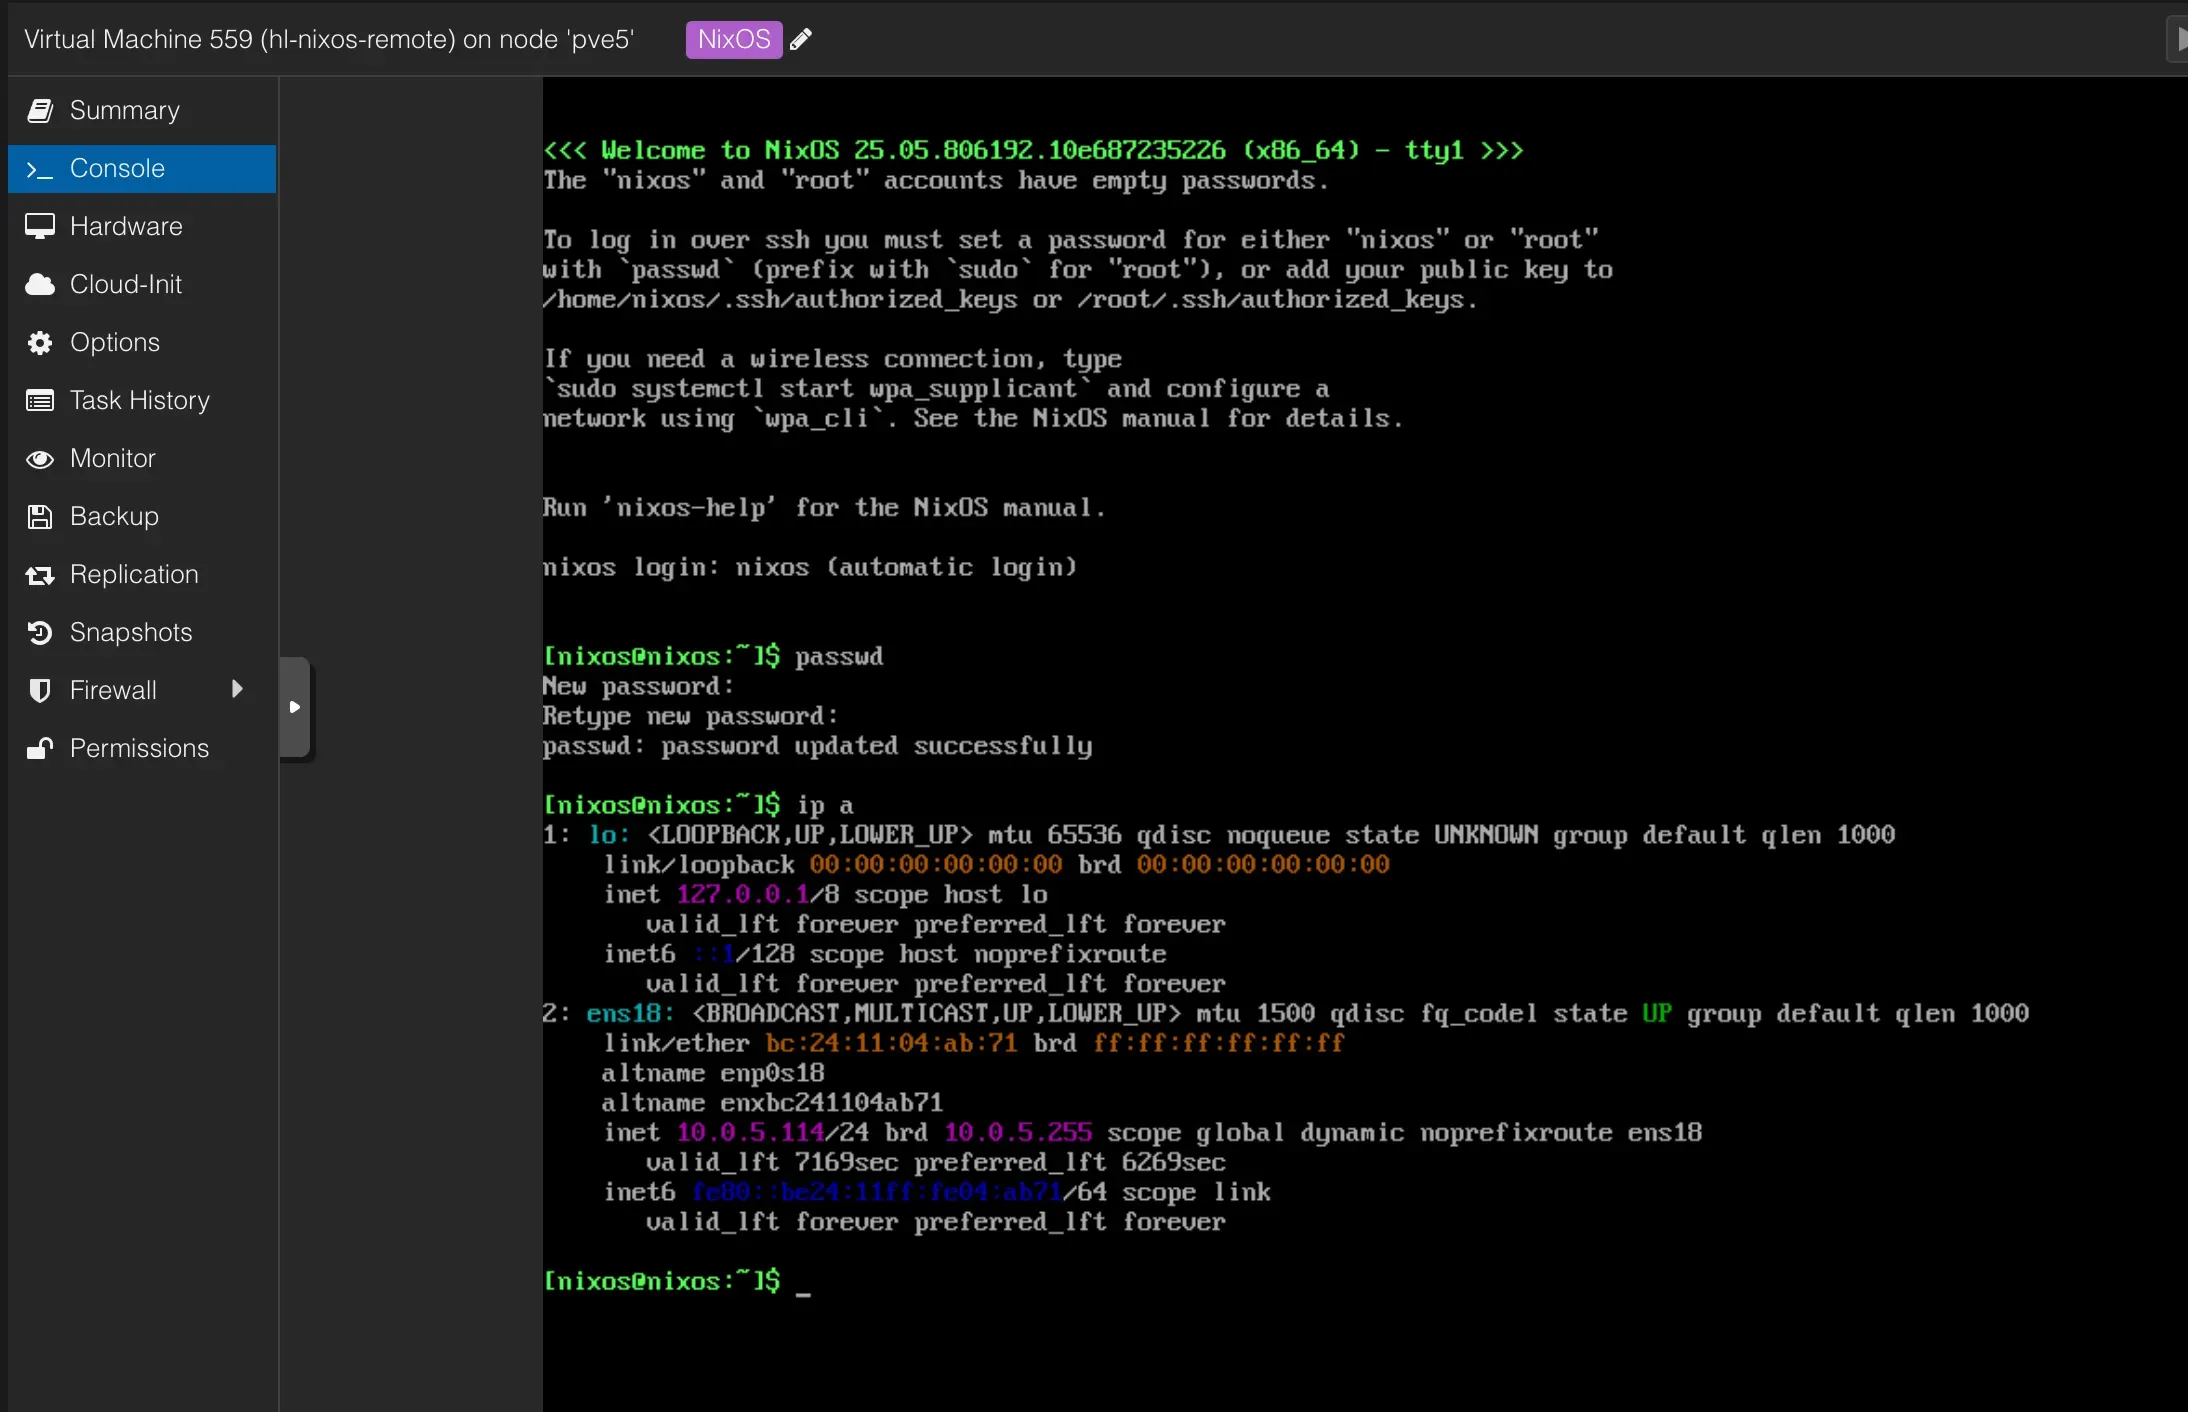
That’s it. Seriously. Don’t touch the target machine again. The rest is all handled remotely.
The Command of Power#
Now, back on our maintenance server, it’s time to assemble our flake and pull the trigger.
First, let’s create the rest of our configuration files.
---flake.nix
{
  description = "Homelab NixOS configuration using Colmena";
  inputs = {
    nixpkgs.url = "github:nixos/nixpkgs?ref=nixos-unstable";
    systems.url = "github:nix-systems/default";
    disko ={
      url = "github:nix-community/disko";
      inputs.nixpkgs.follows = "nixpkgs";
    };
    sops-nix = {
      url = "github:Mic92/sops-nix";
      inputs.nixpkgs.follows = "nixpkgs";
    };
    home-manager = {
      url = "home-manager";
      inputs.nixpkgs.follows = "nixpkgs";
    };
    colmena.url = "github:zhaofengli/colmena";
  };

  outputs =
    {
      self,
      nixpkgs,
      systems,
      disko,
      sops-nix,
      home-manager,
      colmena,
      ...
    }@inputs:
    let
 forEachSystem =
          f: nixpkgs.lib.genAttrs (import systems) (system: f system nixpkgs.legacyPackages.${system});
      mkColmenaConfig =
        {
          user ? "hacstac",
          host,
          buildOnTarget ? false,
          system ? "x86_64-linux",
          extraModules ? [ ],
          hostModule,
        }:
        {
          deployment = {
            targetHost = host;
            targetPort = 22;
            targetUser = user;
            buildOnTarget = buildOnTarget;
            tags = [ "homelab" ];
          };
          nixpkgs.system = system;
          imports = [
            disko.nixosModules.disko
            home-manager.nixosModules.home-manager
            ./servers/configuration.nix
            hostModule
          ] ++ extraModules;
          time.timeZone = "Asia/Kolkata";
        };
    in
    {
      colmenaHive = colmena.lib.makeHive self.outputs.colmena;

      colmena = {
        meta = {
          nixpkgs = import nixpkgs {
            system = "x86_64-linux";
            overlays = [];
          };
        };

        defaults = { pkgs, ... }: {
          environment.systemPackages = [
            pkgs.curl
          ];
        };
        hl-nixos = mkColmenaConfig {
          host = "hl-nixos";
          buildOnTarget = false;
          hostModule = ./servers/tools;
          extraModules = [
            sops-nix.nixosModules.sops
          ];
        };
      };

      nixosConfigurations = self.colmenaHive.nodes;

      hl-servers = forEachSystem (
        system: pkgs: {
          apply = {
            type = "app";
            program = toString (
              pkgs.writeShellScript "apply" ''
                #!/usr/bin/env bash
                set -euo pipefail

                if [ $# -eq 0 ]; then
                  echo "Usage: apply <server-name>"
                  exit 1
                fi

                serverName="$1"
                echo "Applying to server: $serverName"
                exec ${
                  colmena.packages.${system}.colmena
                }/bin/colmena apply --on "$serverName"
              ''
            );
          };
        }
      );
    };
}
------configuration.nix
{
modulesPath,
lib,
pkgs,
config,
...
}:
{
imports = [
(modulesPath + "/installer/scan/not-detected.nix")
(modulesPath + "/profiles/qemu-guest.nix")
./disk-config.nix
];
#boot.loader.grub.enable = true;
#boot.loader.grub.device = "/dev/sda";
boot.loader.grub = {
efiSupport = true;
efiInstallAsRemovable = true;
device = "nodev";
};
home-manager = {
useUserPackages = true;
useGlobalPkgs = true;
users.hacstac = ./home.nix;
backupFileExtension = "backup";
};
nixpkgs = {
config = {
allowUnfree = true;
allowUnfreePredicate = _: true;
};
};
nix = {
settings = {
experimental-features = "nix-command flakes";
warn-dirty = false;
auto-optimise-store = true;
download-buffer-size = 128 * 1024 * 1024;
trusted-users = [ "hacstac" ];
};
gc = {
automatic = true;
options = "--delete-older-than 14d";
};
};
environment.systemPackages = map lib.lowPrio [
pkgs.curl
pkgs.gitMinimal
pkgs.vim
];
services.openssh.enable = true;
services.qemuGuest.enable = true;
security.sudo.wheelNeedsPassword = lib.mkForce false;
virtualisation.docker.enable = true;
virtualisation.oci-containers.backend = "docker";
systemd.services.docker-proxy-network = {
description = "Create Docker proxy network";
wantedBy = [ "multi-user.target" ];
after = [ "docker.service" ];
serviceConfig = {
Type = "oneshot";
ExecStart = pkgs.writeShellScript "create-proxy-network" ''
if ! ${pkgs.docker}/bin/docker network inspect proxy >/dev/null 2>&1; then
${pkgs.docker}/bin/docker network create proxy
fi
'';
};
};
programs.zsh = {
enable = true;
};
users.users.hacstac = {
isNormalUser = true;
shell = pkgs.zsh;
extraGroups = [
"networkmanager"
"wheel"
"docker"
];
packages = with pkgs; [ ];
openssh.authorizedKeys.keys = [
"ssh-ed25519 AAAAC3NzaC1lZDI1NTE5AAAAIJ5ZqSa7YeUmeOKnmzmPLHErdtty1BFOLux1r5TplEy9 hacstac"
];
};
security.sudo.extraRules = [
{
users = [ "hacstac" ];
commands = [
{
command = "ALL";
options = [ "NOPASSWD" ];
}
];
}
];
system.extraDependencies = with config.boot.kernelPackages; [
kernel
kernel.dev
];
time.timeZone = "Asia/Kolkata";
networking.firewall.enable = true;
nix.extraOptions = "keep-outputs = true";
system.stateVersion = "25.05";
services.journald = {
extraConfig = ''
SystemMaxUse=2G
MaxRetentionSec=1month
'';
};
}
------home.nix
{ pkgs, ... }:
{
programs.zsh = {
enable = true;
autocd = true;
enableCompletion = true;
autosuggestion.enable = true;
syntaxHighlighting.enable = true;
historySubstringSearch.enable = true;
history = {
extended = true;
size = 100000;
save = 100000;
share = true;
ignoreDups = true;
ignoreSpace = true;
};
initContent = ''
bindkey '^w' forward-word
bindkey '^b' backward-kill-word
bindkey '^f' autosuggest-accept
bindkey '^p' history-substring-search-up
bindkey '^n' history-substring-search-down
'';
};
programs.starship = {
enable = true;
enableZshIntegration = true;
settings = {
add_newline = false;
format = "$directory$git_branch$git_status$cmd_duration\n$character";
directory = {
style = "blue";
};
git_branch = {
format = "[$branch]($style) ";
style = "purple";
};
git_status = {
format = "[[(*$conflicted$untracked$modified$staged$renamed$deleted)](228) ($ahead_behind$stashed)]($style)";
style = "cyan";
conflicted = "";
untracked = "";
modified = "";
staged = "";
renamed = "";
deleted = "";
stashed = "≡";
};
cmd_duration = {
format = "[$duration]($style) ";
style = "yellow";
};
character = {
success_symbol = "[❯](purple)";
error_symbol = "[❯](red)";
vimcmd_symbol = "[❮](green)";
};
};
};
home.username = "hacstac";
home.homeDirectory = "/home/hacstac";
home.stateVersion = "25.05";
home.packages = with pkgs; [
openssl
git
tree
bat
fzf
htop
jq
vim
];
}
---With all our files in place, navigate to the root of your Git repo on the maintenance server and run the command:
nix run github:nix-community/nixos-anywhere — — flake.#hl-nixos nixos@10.0.5.114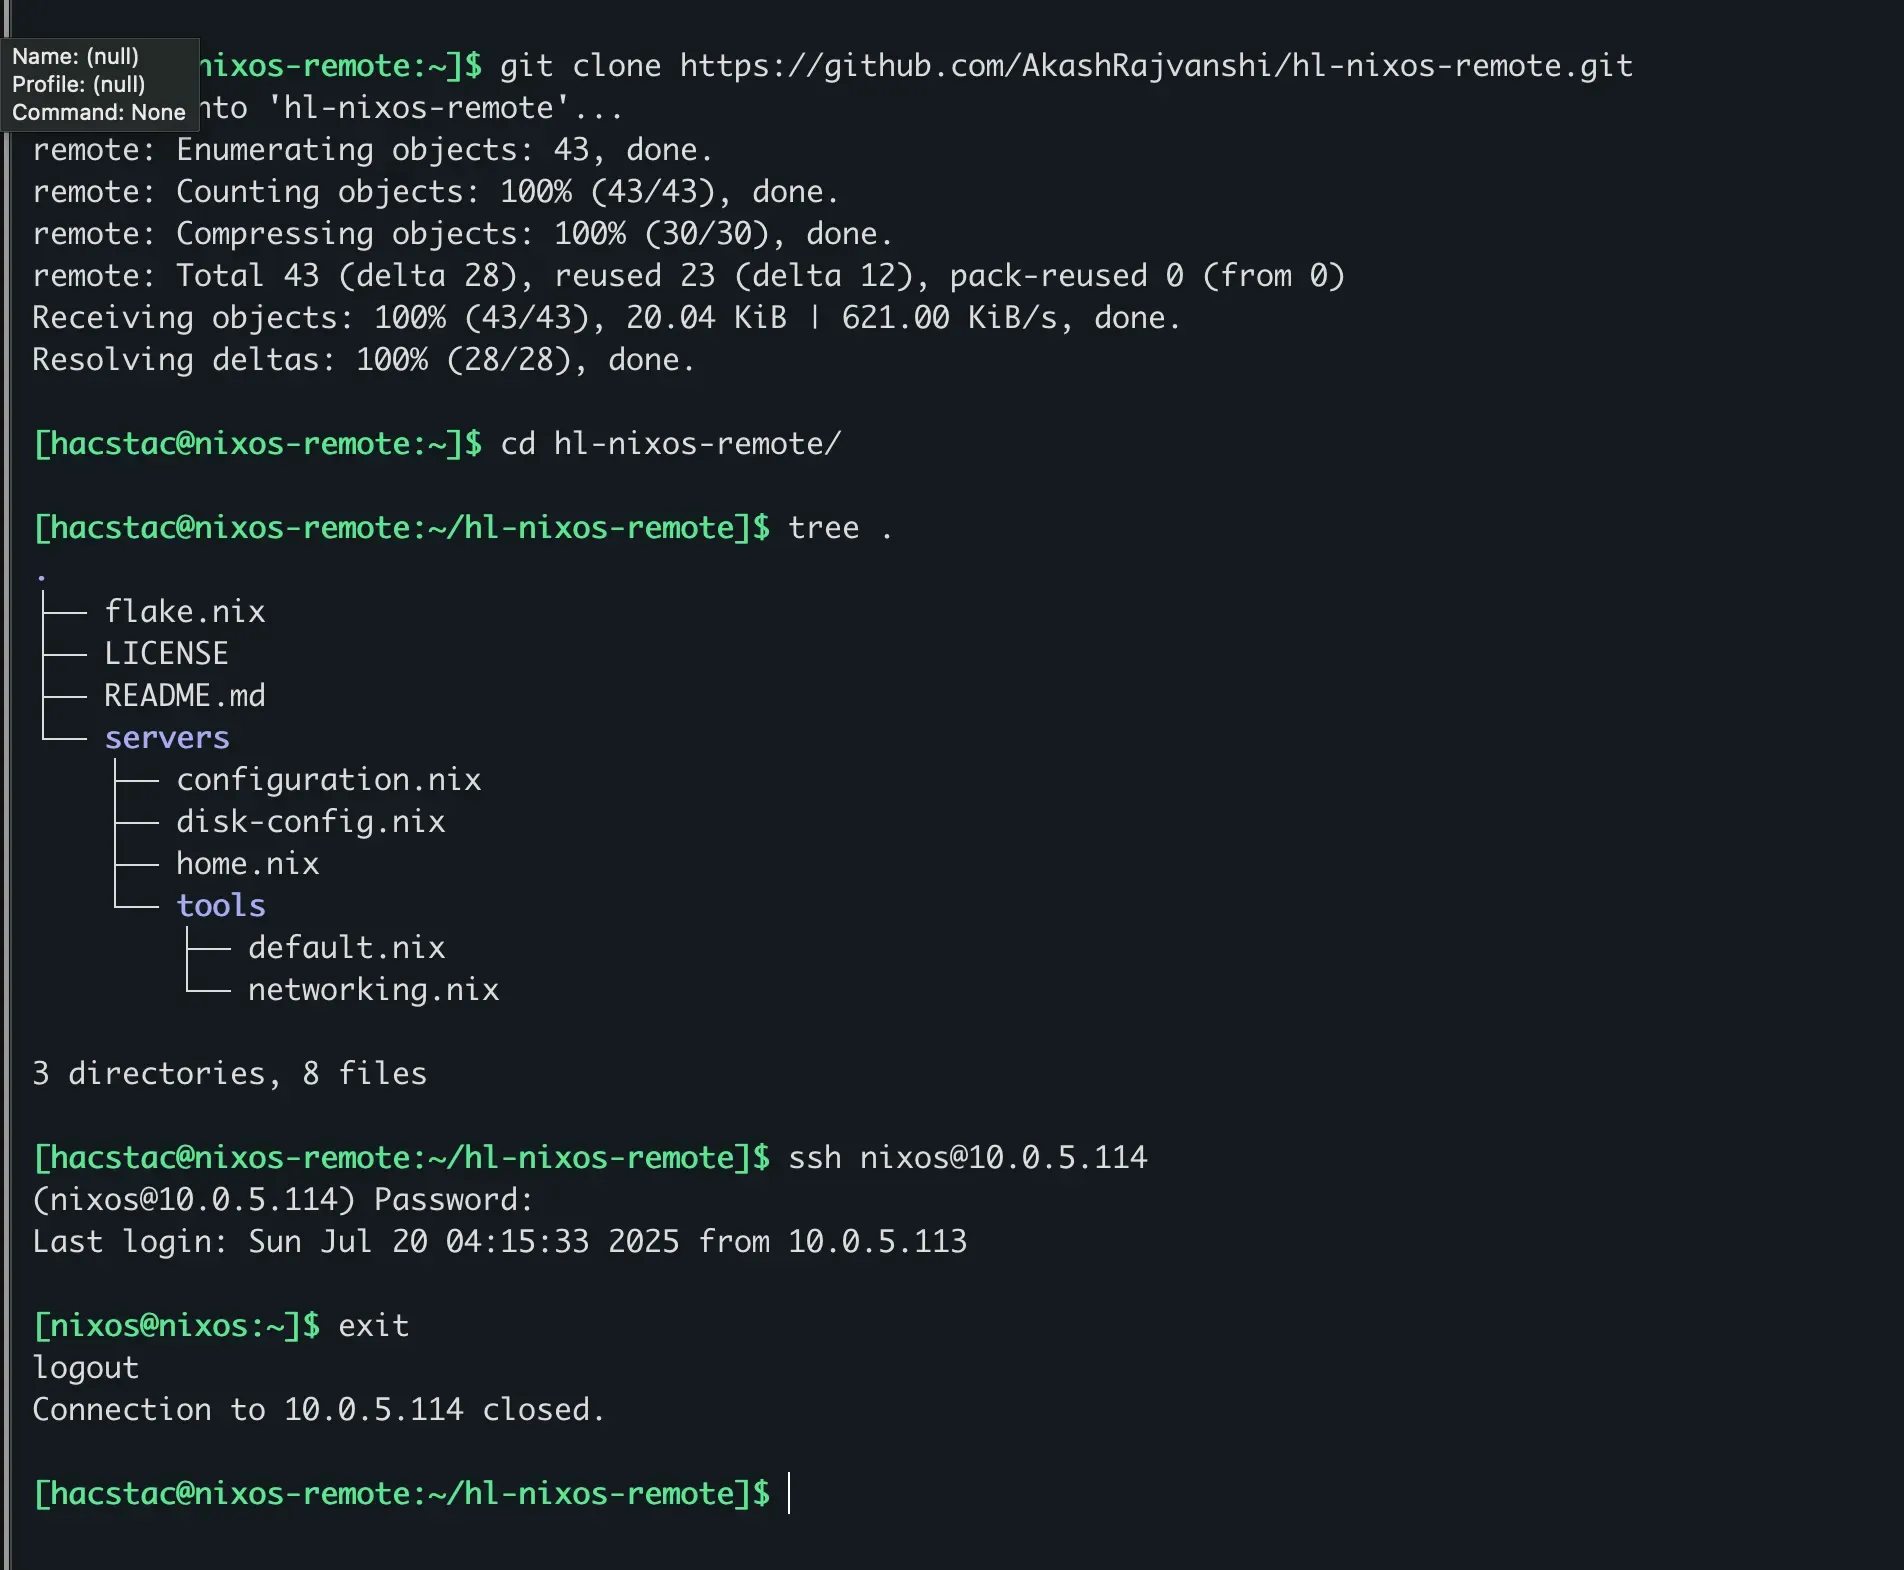
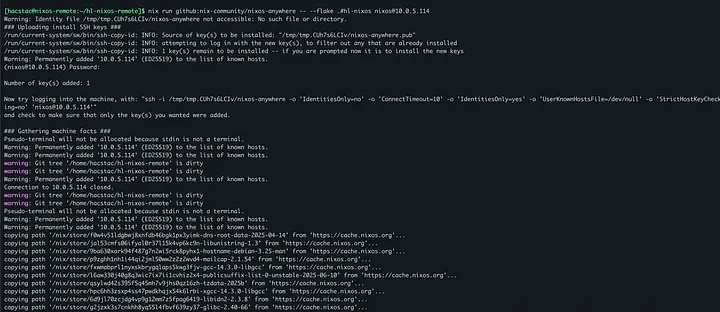
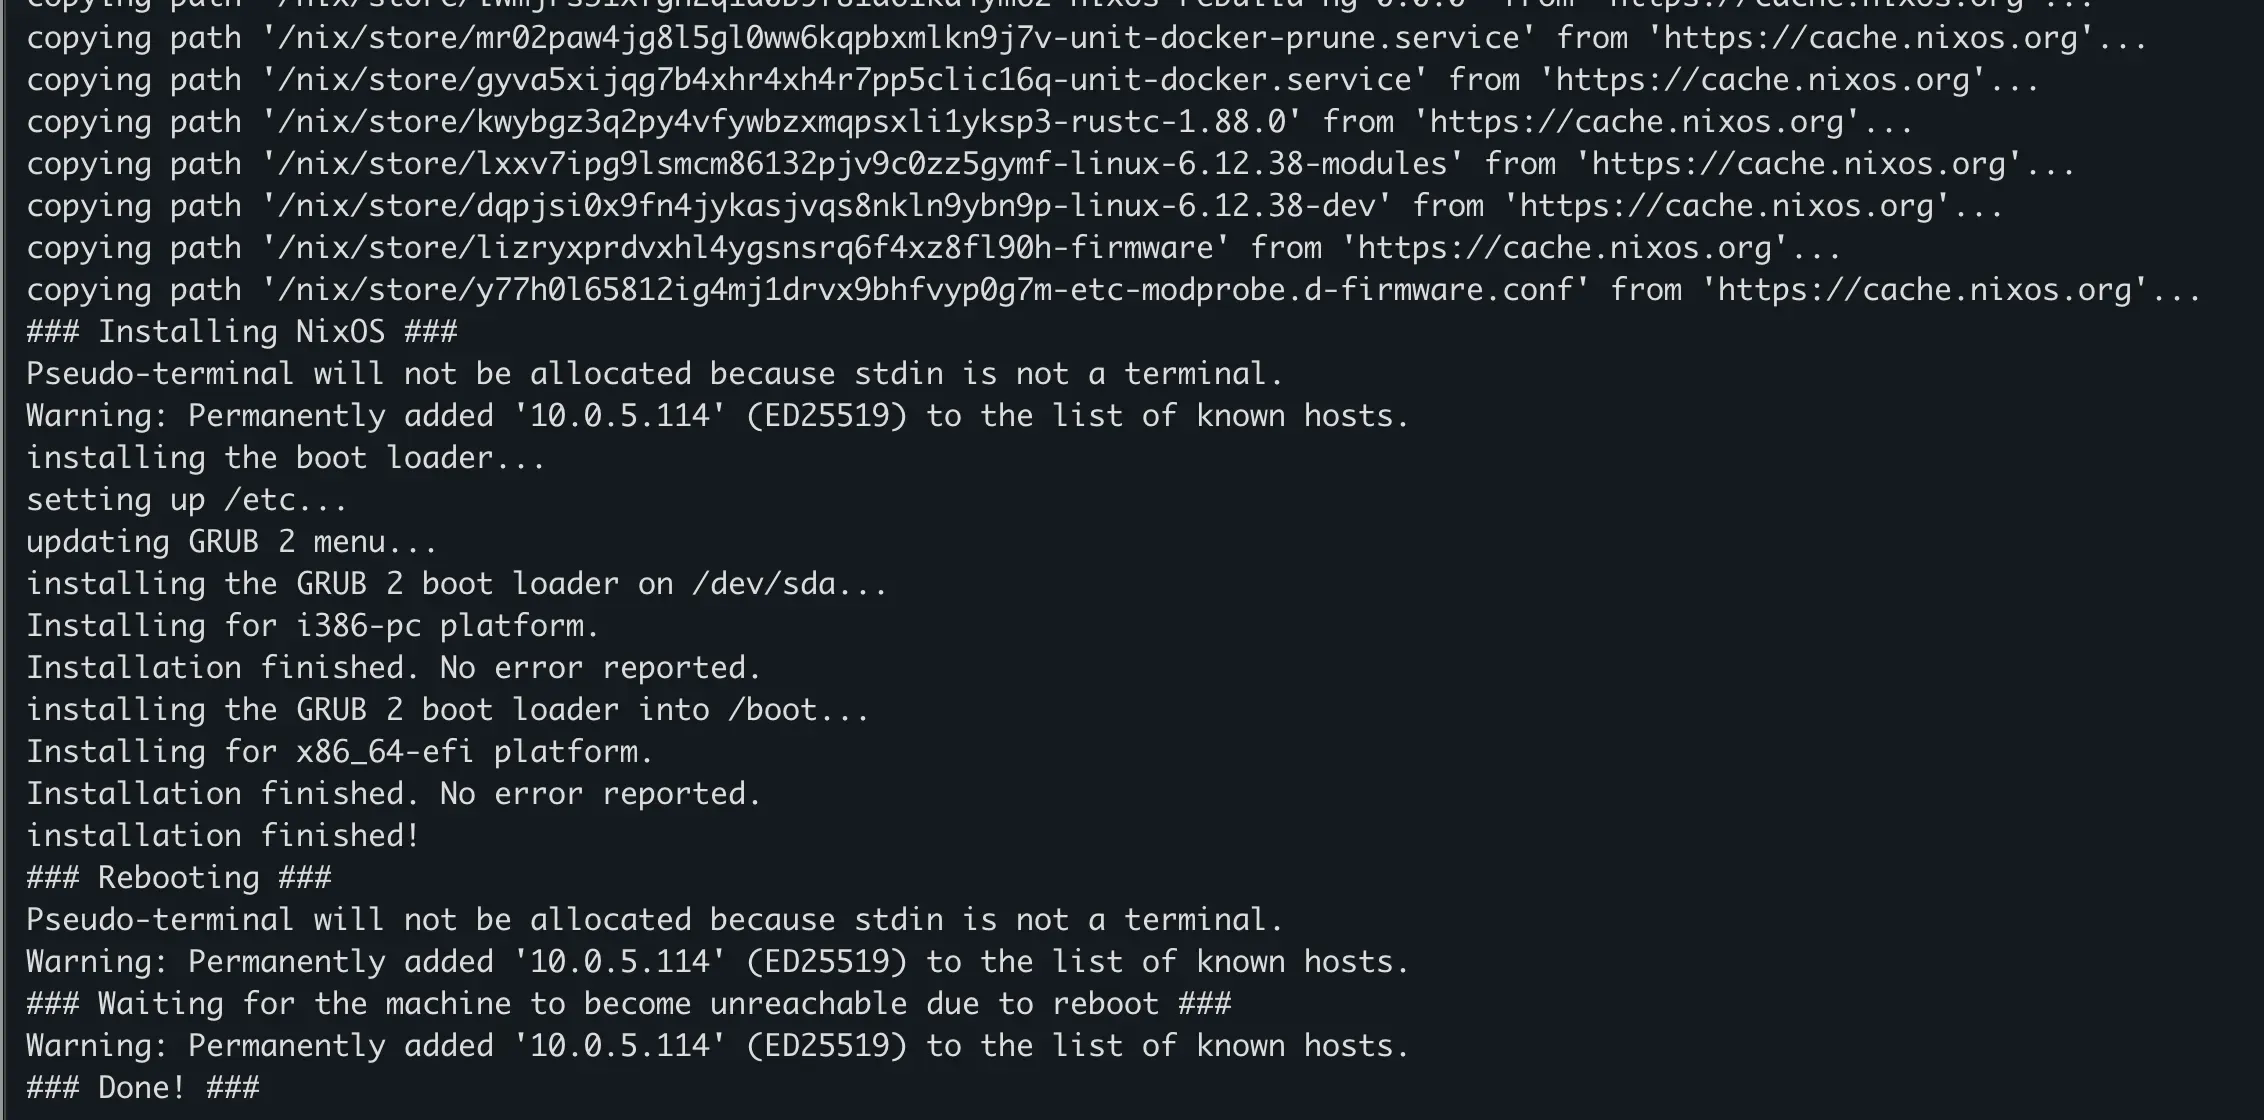
You will be prompted for the nixos user’s password you set on the target machine. Enter it, confirm it, and then sit back and watch the show.
Success! Our First Declarative Boot
Once the command completes with a triumphant “Installation finished!” message, reboot the target VM in Proxmox. Make sure to detach the ISO image from the virtual CD/DVD drive before you start it up.